When it comes to electrical wiring, precision is paramount. Using the right tools can make all the difference, especially when dealing with Romex cable, which is commonly used in residential wiring. A Romex stripping tool is an essential instrument for electricians and DIY enthusiasts alike. This article will guide you through the proper use of this tool to achieve clean cuts, ensuring safety and efficiency in your electrical projects.
What is Romex Cable?

Romex is a brand name for non-metallic (NM) sheathed cable, widely used in residential electrical wiring. It typically consists of two or more insulated conductors and a bare ground wire, all encased in a flexible plastic sheath. The advantages of using Romex include:
- Cost-effective
- Lightweight and easy to handle
- Resistance to moisture and corrosion
Understanding the structure of Romex cable is crucial when using a stripping tool, as it ensures that you don’t damage the inner conductors while removing the outer sheath.
Choosing the Right Romex Stripping Tool

Before diving into the proper usage of a Romex stripping tool, it’s essential to choose the right one. Here are some factors to consider:
- Type of Tool: There are manual and automatic Romex stripping tools. Manual tools require more effort but offer greater control, while automatic tools streamline the process.
- Size Compatibility: Ensure that the tool is compatible with the gauge of the Romex cable you are working with, typically 14/2, 12/2, or 10/2.
- Durability: Look for tools made from high-quality materials that can withstand repeated use without dulling.
Preparing for the Job
Preparation is key to achieving clean cuts with your Romex stripping tool. Follow these steps before you start stripping the cable:
- Gather Your Tools: Besides the Romex stripping tool, you’ll need a pair of safety goggles, gloves, and a measuring tape.
- Measure the Length: Determine how much cable you need to strip based on your project requirements.
- Inspect the Cable: Check for any visible damage to the Romex cable before proceeding.
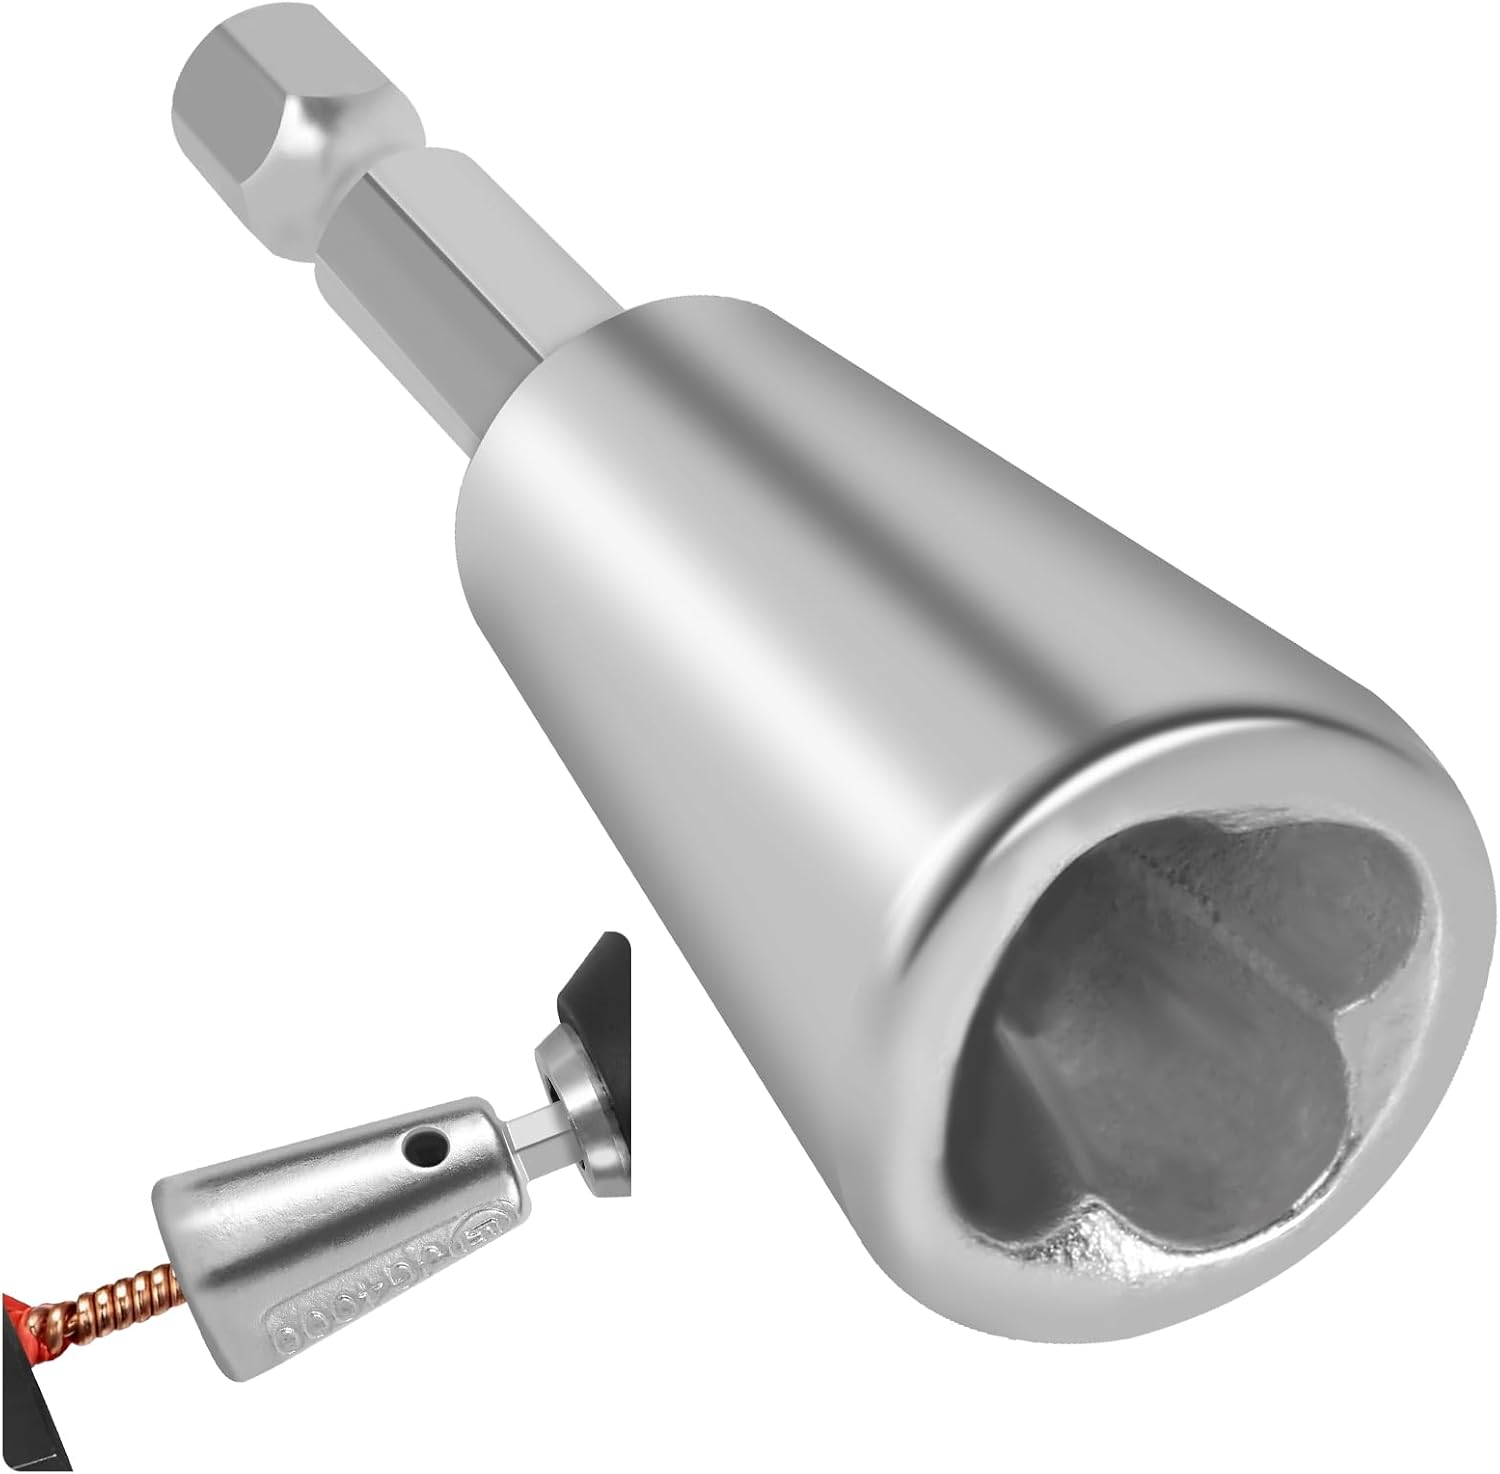
How to Properly Use a Romex Stripping Tool

Using a Romex stripping tool correctly ensures clean cuts and prevents damage to the inner conductors. Follow these steps:
Step 1: Set Up the Cable
Start by laying the Romex cable flat on a stable surface. This will give you the leverage you need to strip it effectively.
Step 2: Measure and Mark

Using your measuring tape, determine how much insulation you need to remove. Use a marker to indicate the strip length on the cable. A common length is about 6 to 8 inches, but this may vary depending on your project.
Step 3: Position the Tool
Open the Romex stripping tool and place it around the cable at the marked spot. Ensure that the cutting blade aligns with the outer sheath of the cable.
Step 4: Stripping the Cable
Depending on the type of tool you’re using, the stripping process will vary:
- For Manual Tools: Squeeze the handles together firmly, allowing the blades to cut through the plastic sheath. Rotate the tool around the cable if needed.
- For Automatic Tools: Simply insert the cable into the designated slot and squeeze the handle. The tool will automatically strip the cable without requiring much effort.
Step 5: Inspect the Cut
Once the outer sheath is removed, inspect the inner conductors. They should be intact and free from cuts or nicks. If you notice any damage, it’s best to cut the cable back and try again.
Common Mistakes to Avoid

Even seasoned electricians can make mistakes when using a Romex stripping tool. Here are some common pitfalls to avoid:
- Applying Too Much Pressure: Over-squeezing the tool can damage the inner conductors.
- Not Aligning the Tool Properly: Misalignment can lead to uneven cuts or accidental damage to the wires.
- Skipping Safety Gear: Always wear safety goggles and gloves to protect yourself from flying debris.
Case Study: The Importance of Proper Stripping Techniques
In a recent study conducted by the National Electrical Contractors Association (NECA), improper stripping techniques accounted for over 25% of electrical failures in residential wiring. In several cases, damaged conductors led to short circuits, which could have been avoided by using proper tools and techniques.
Statistics on Electrical Wiring Safety
According to the U.S. Fire Administration, electrical failures account for an estimated 47,000 home fires annually, resulting in over 400 deaths. Many of these incidents can be traced back to poor wiring practices, including improper stripping of cables. By mastering the use of a Romex stripping tool, you can significantly reduce the risk of electrical failures.
Maintenance of Your Romex Stripping Tool
To ensure longevity and optimal performance from your Romex stripping tool, follow these maintenance tips:
- Clean the Tool: After each use, wipe down the blades and handles to remove debris and moisture.
- Store Properly: Keep the tool in a dry, safe place to prevent rust and damage.
- Regularly Inspect: Check for any signs of wear and replace the tool if necessary.
Using a Romex stripping tool correctly is essential for achieving clean cuts and ensuring safety in your electrical projects. By understanding the proper techniques, avoiding common mistakes, and maintaining your tools, you can enhance your efficiency and minimize the risk of electrical failures. Remember, preparation and technique are key; with practice, you’ll master the art of stripping Romex cable like a pro. Whether you’re a seasoned electrician or a DIY enthusiast, mastering this essential skill will contribute to safer, more effective electrical work.


